DENTAL RECORDS PRO - HELP
Manage Persons
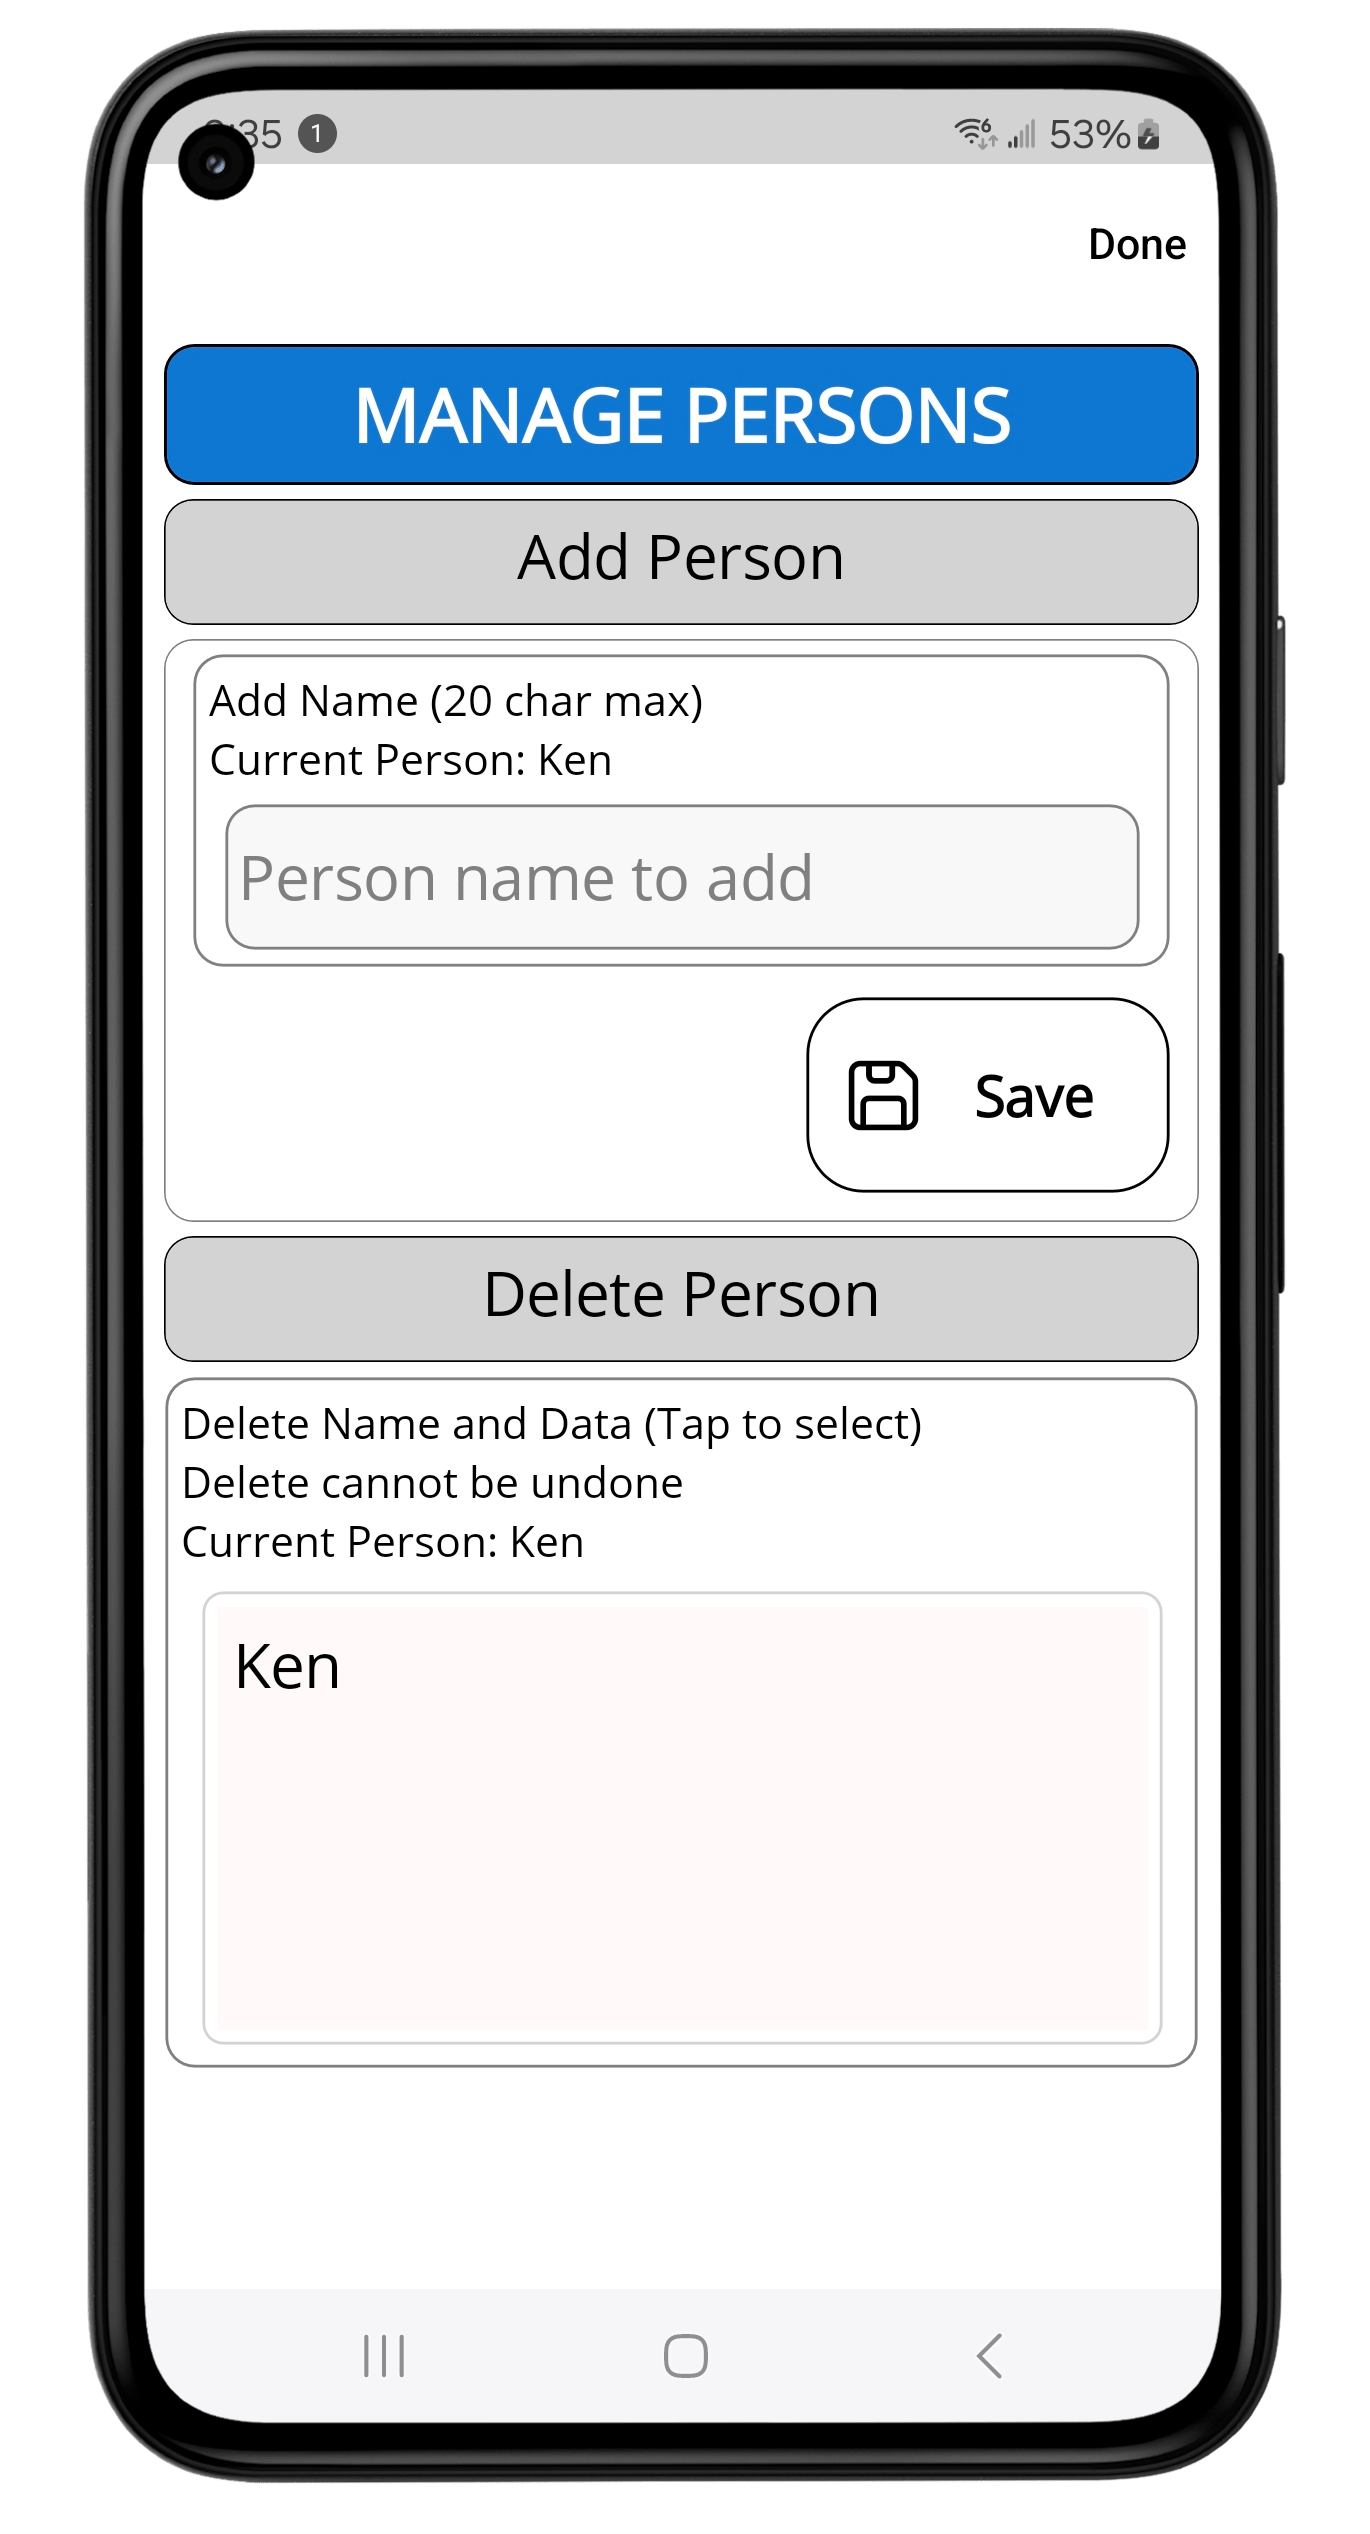
Add Person
Before you can input any data, you must add a person. This is done in the Manage Persons page.
To access this page:
1. Tap OPTIONS (3 dots)
2. Select: Manage Persons
3. Under ‘Add Person’, type in a Person Name
4. Select Measurements: Imperial or Metric
5. Select Male or Female
6. Enter height
7. Click ‘Save’
8. Add another person, or tap ‘Done’ at the top to begin adding data
Note: The measurements options are utilized in the Body Weight/BMI category.
Delete Person
In the Manage Persons page, find the person name to delete in the list. Tap the name to delete the person from the app.
Note: This action will delete all the data and the print file from the app and CANNOT be undone.

Add Records
Tap the Category Icon and select a dental category from the shown list. Once in that screen, you can tap the Add ‘+’ Icon to go to the add screen for that category.
Edit Records
Tap on an existing item in the category listing, to show options for that entry.
Note: Not all categories have an ‘Edit’ function, as some don’t need it.
Delete Records
Tap on an existing item in the category listing, to show options for that entry.
Tap on ‘Delete’ to delete that entry. This action cannot be undone.
Providers Entry Special Functions
Appointments and Provider Category
If you wish to use the Maps Navigation and Call feature when you tap on an entry in the APPOINTMENTS or PROVIDERS page, then you must enter the provider information first, including full address and 10 digit phone number. This means, that you first go the the Provider page and enter the information completely and precisely.
When you add an entry for an Appointment, you tap the ‘Choose Provider’ button and select from the resultant provider list. In this way, the address and phone for that provider are stored in that appointment, and can be directly accessed when you tap on an appointment entry.


Category Sorting
If a category allows for manual sorting, the UP/DOWN icon will show in the top bar. Tap it to see options.
Category Groups
Some categories have options in their ‘Add’ screens for the selection of a group title.
Appointments
Dentist, Hygienist
Medications
Prescriptions, OTC, Supplements
Providers
Dentist, Hygienist
Insurance
Dental, Medical (some medical have dental inclusions)
Teeth Numbering
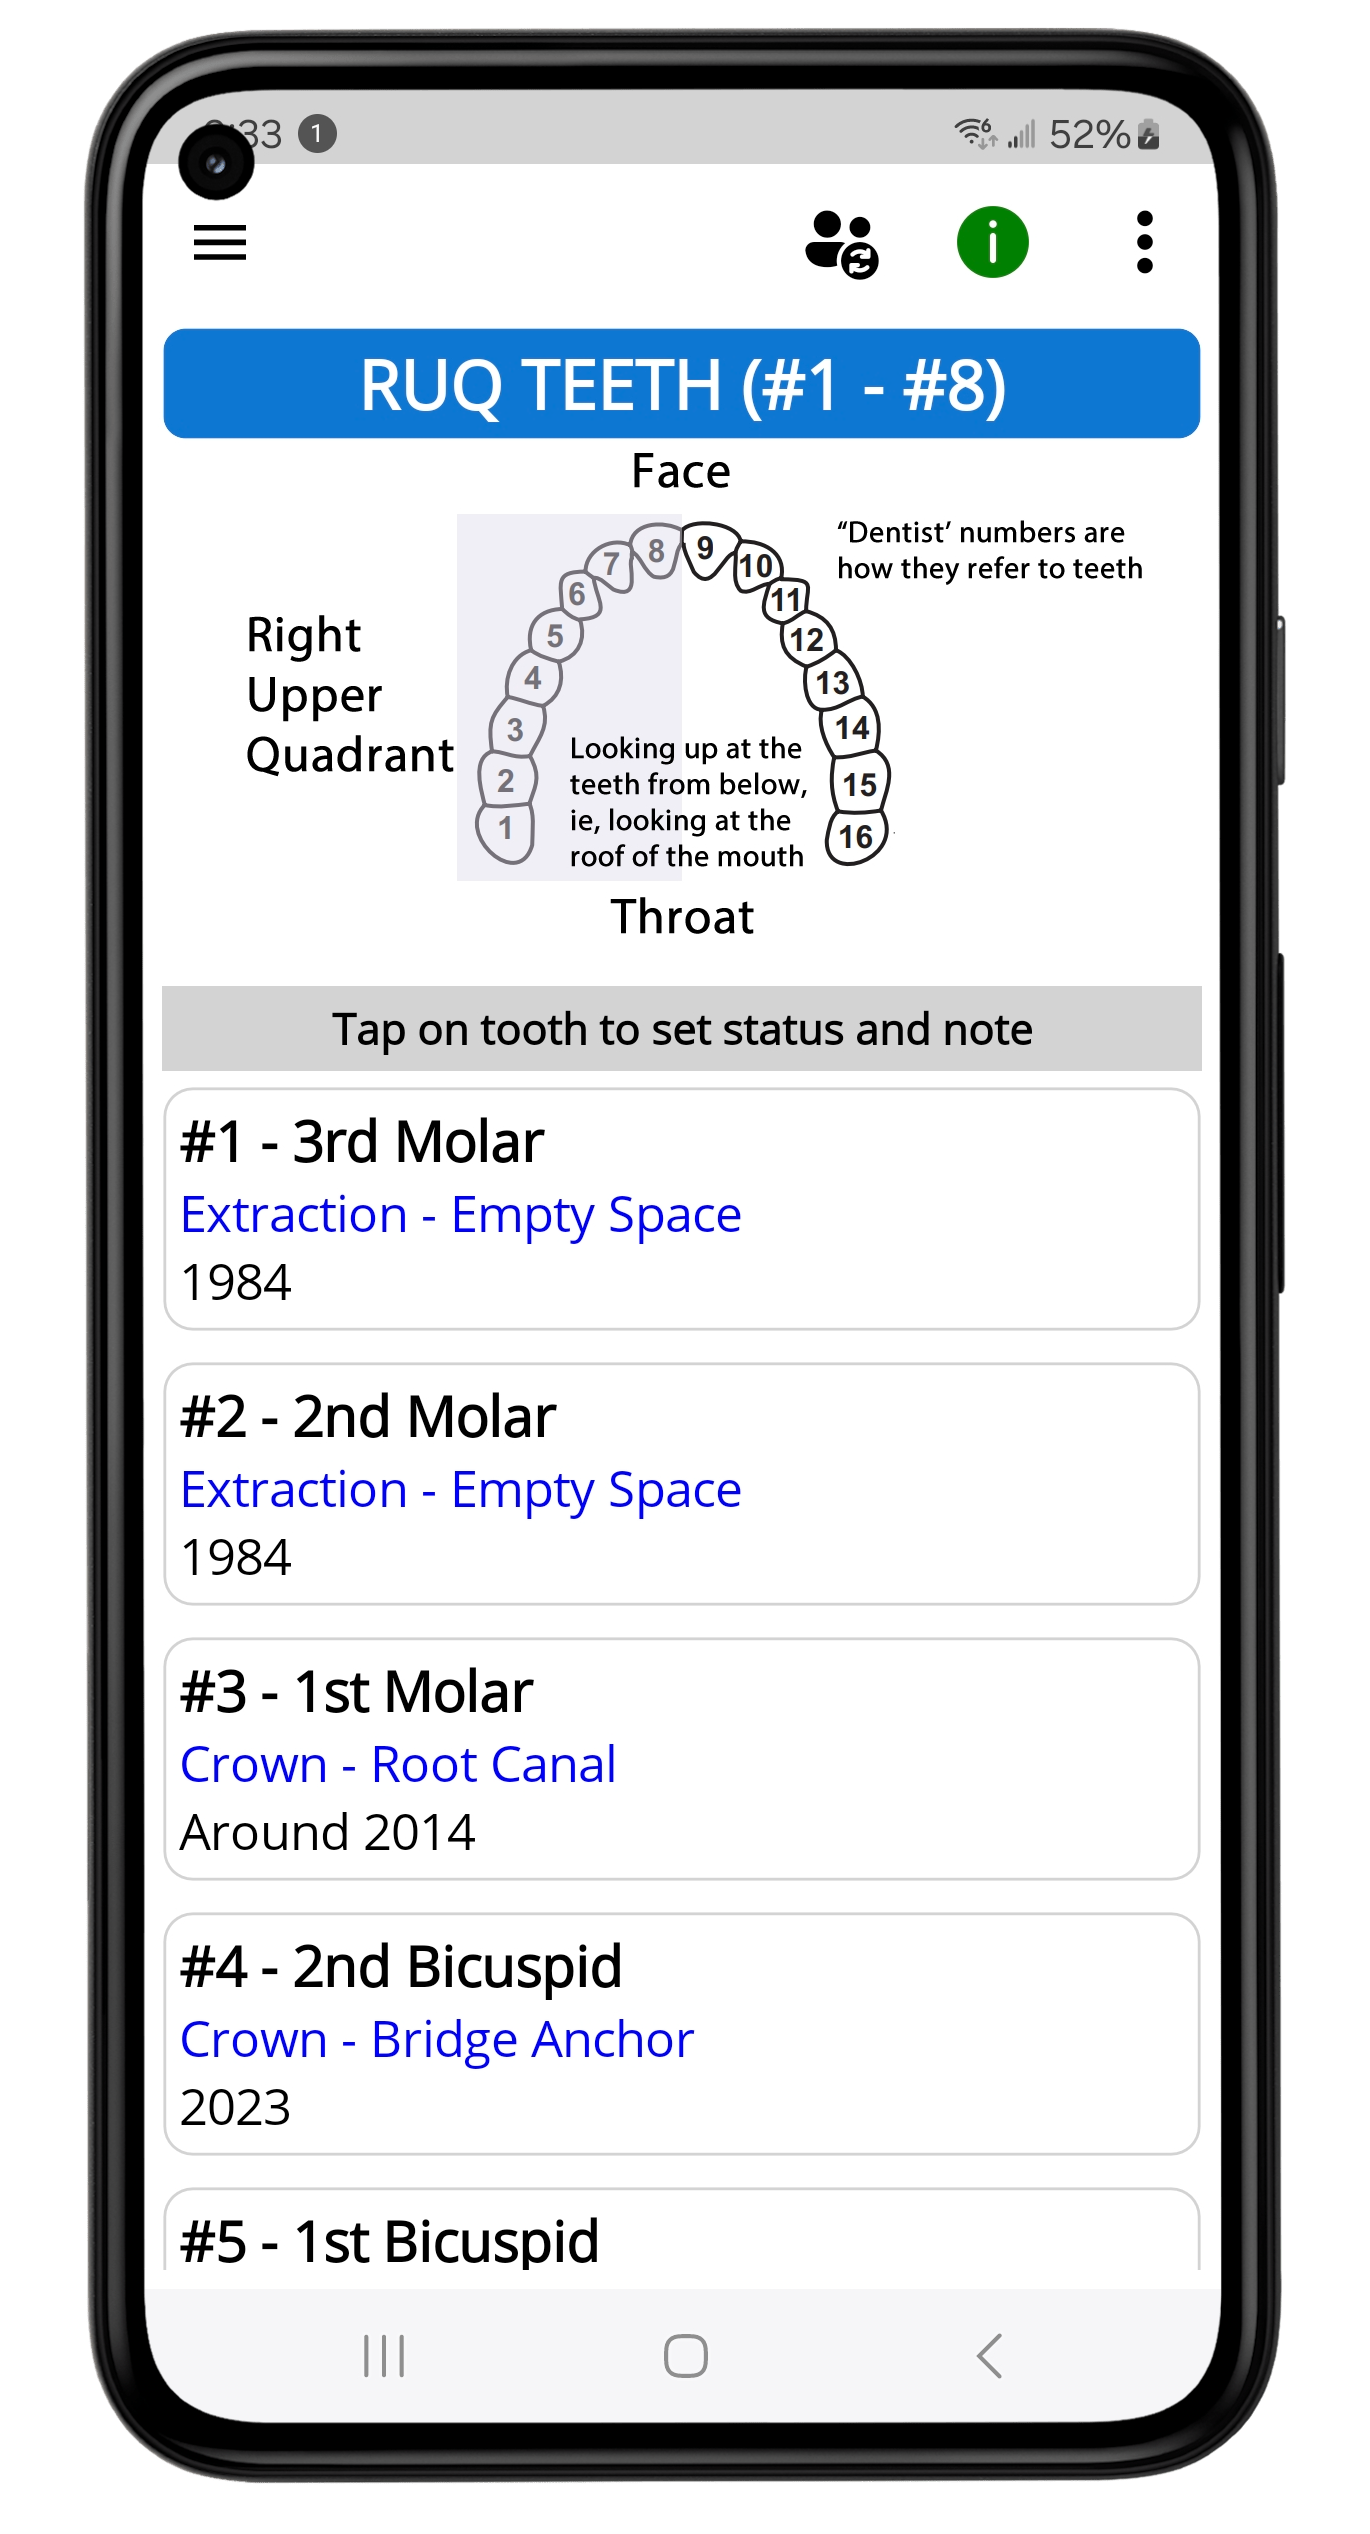
You originally have 32 teeth. They are divided into 4 quadrants and the app has a page for each quadrant. Therefore, each quadrant has 8 teeth to classify in the app. Some teeth will be easy for you to add the data, while others maybe more difficult, in that some prodecures may have been done years ago. Just do the best you can and enlist your dentist/hygienist help if needed.
RUQ – Right Upper Quadrant
Teeth #1-#8
LUQ – Left Upper Quadrant
Teeth #9-#16
LLQ – Left Lower Quadrant
Teeth #17-#24
RLQ – Right Lower Quadrant
Teeth #25-#32
In each teeth page, just ‘Tap’ on a tooth to open the ‘Edit Tooth’ page.
There you will find the 2 options for the tooth:
Status
Select from the drop menu or type in your own value
Note
Enter freeform note, possibly including the date if known

Implants
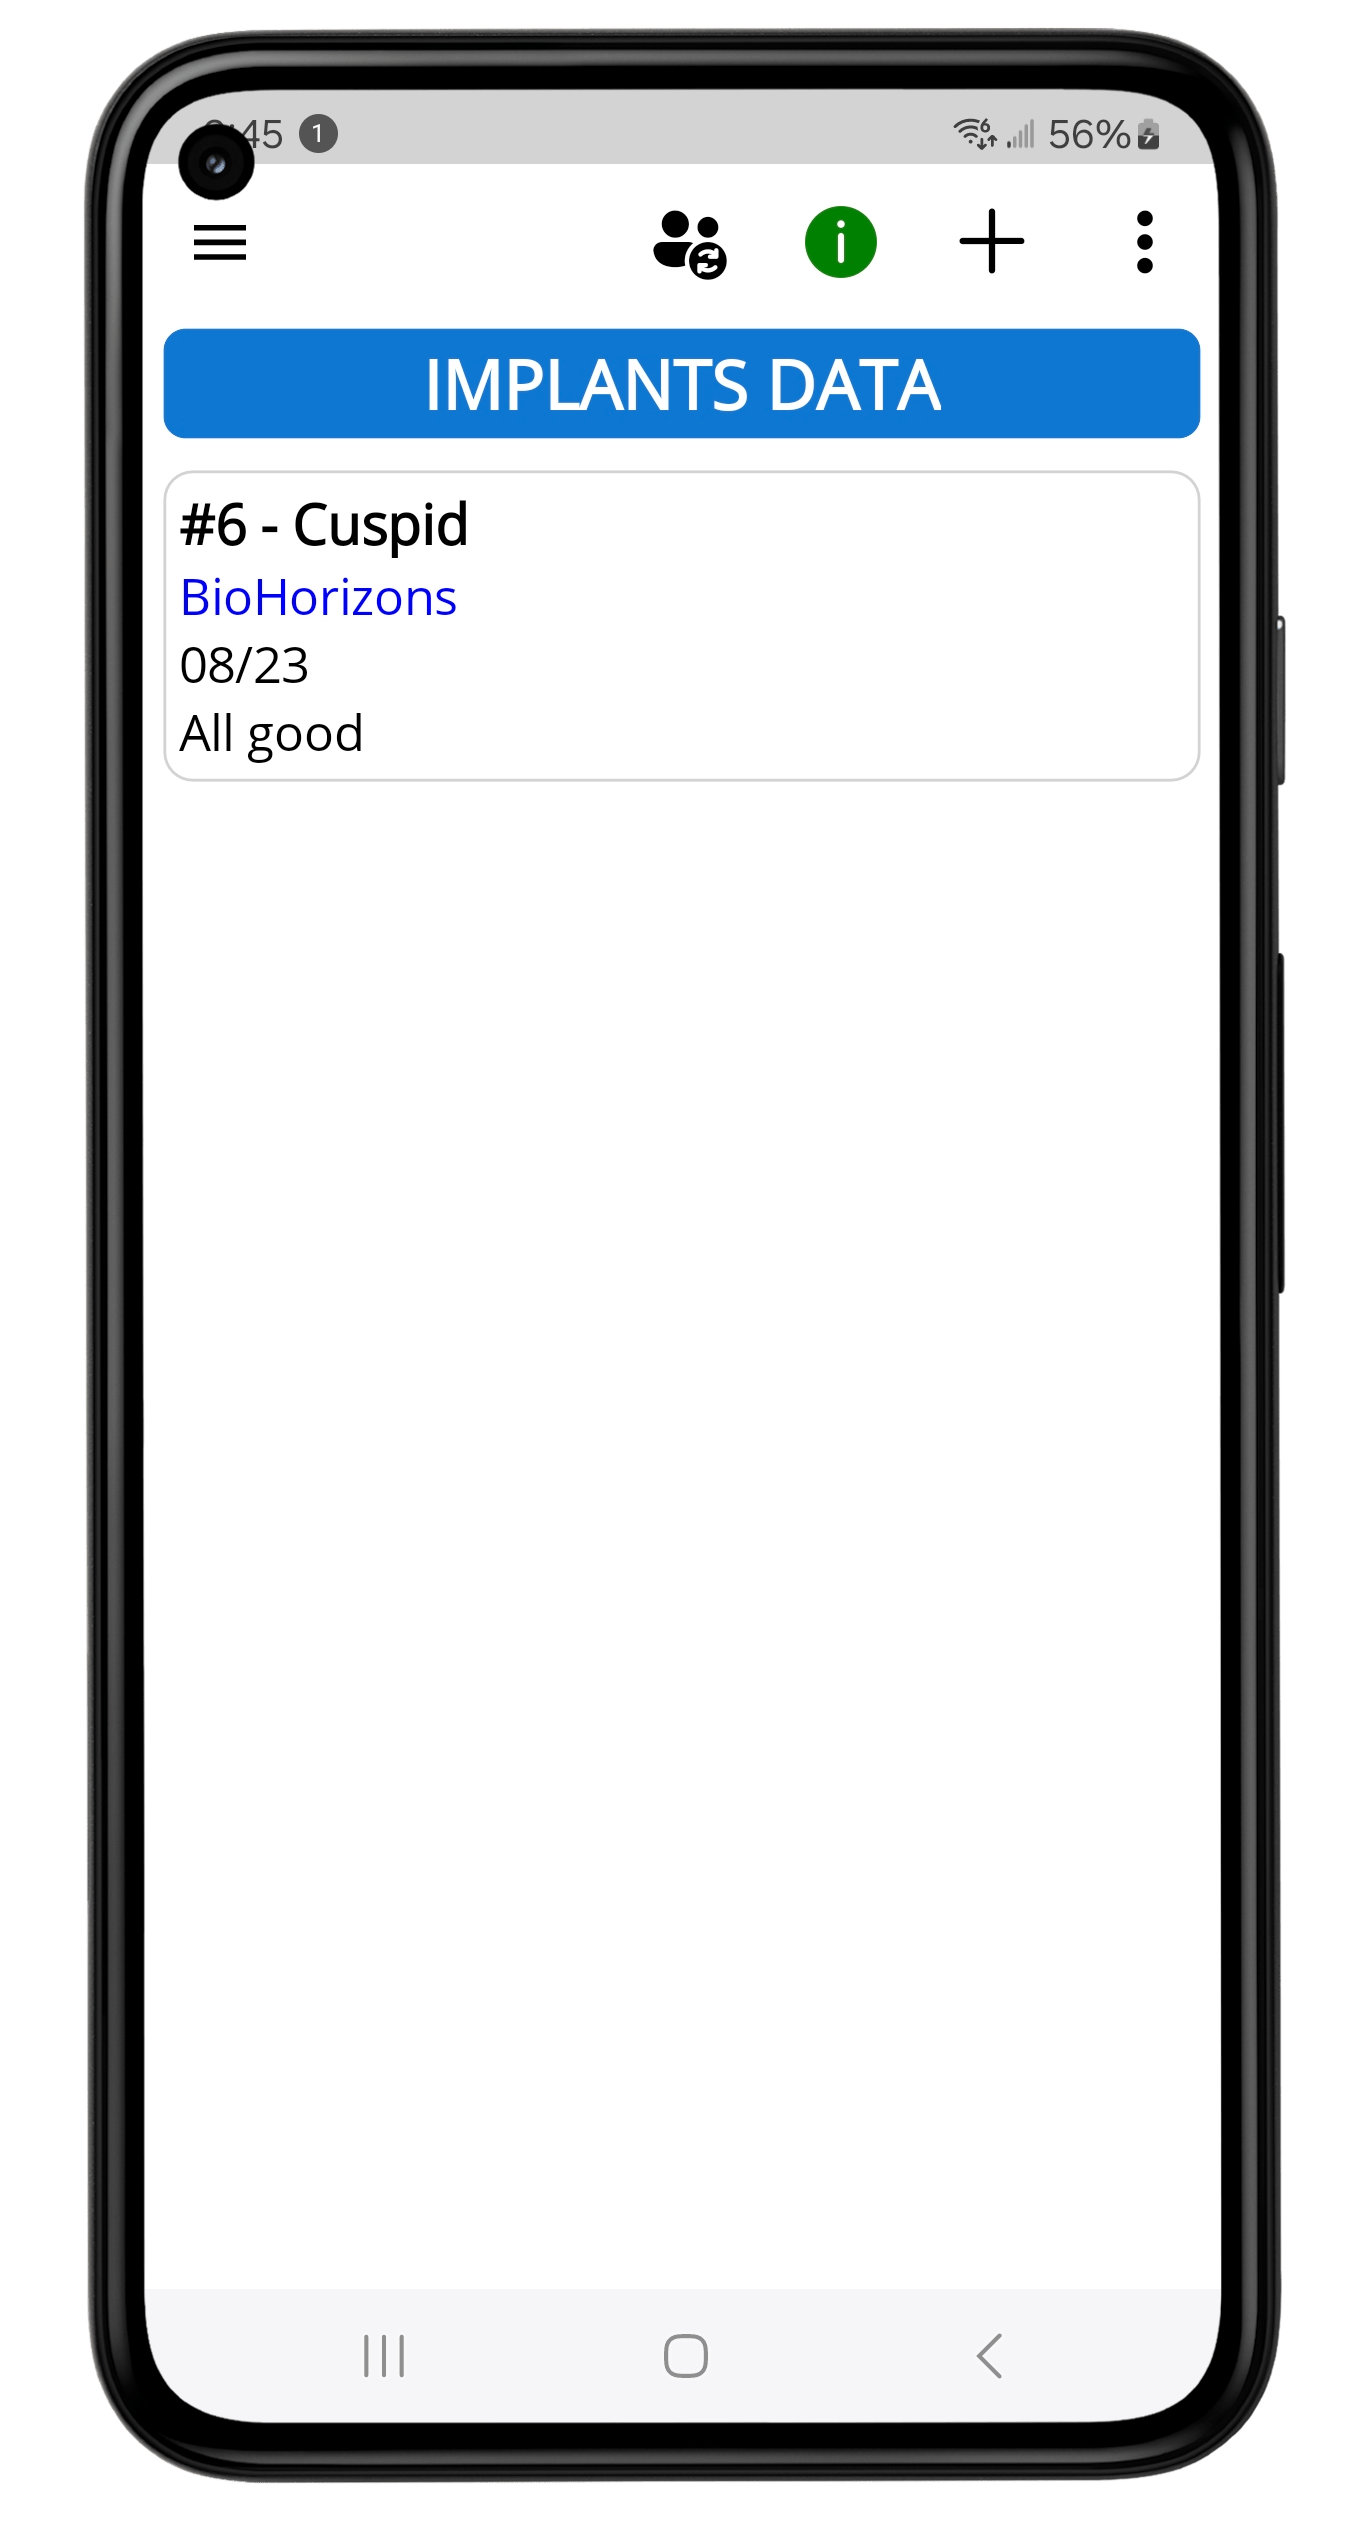
Dentists have informed us that there are times when a patient comes to them with an existing implant and some problems. At that time, the new dentist needs to know the history of the implant, primarily the ‘Brand’ of the device.
Therefore, when you get an implant, also get the Brand info from the provider. If the implant was done a while back, then simply contact that provider and get the info.
In the category menu, tap ‘Implants’, then the ‘+’ icon to add implant data.
Data to enter include:
Brand
Use the drop menu or type in brand yourself.
Implant Location
Select the proper ‘Tooth Number’
Completed Date
Date implant finished
Note
Any thing else you want here

Print Medical Record
You can print a hard copy of your dental record.
To access:
1. Tap Options (upper 3 dots) and select Print Files.
2. Tap the desired person name
3. Select ‘Read’ or ‘Share’
The print files are simple ‘.txt’ files that are easily shared to your phone’s print app and/or other apps, cloud, and email.
Note: In Options, you can first select ‘Print Settings’. There you can select desired categories to print.
Images for Medical Documents
In the Add Image page, you can open your phone’s camera, take a photo of a medical record or select from your gallery and save it with a name and date.
Recommended documents include x-ray reports, scanned EKG’s, significant test results, etc.
When you are in the Images category listing, you have the option to ‘View Full Page’.
Import / Export Person Data Files
Please note: Quantanon does not provide support for file transport issues, as the softwares used are Apple’s, and multiple OS and devices are out there. If the steps outlined below are not working properly, please do an online search and you will find many, many options. Search this: ‘How to transfer files from iPhone to iPad’. Options include:
1. Airdrop
2. Email attachment
3. Share to Mac, then share to other device
4. Share to iCloud
The data files are kept in an easily shared file format, ‘.xml’.
Import File
1. Tap Options (3 dots)
2. Select Import Person File
3. Browse and select from possible saved locations, such as: Downloads, Cloud, Saved email attachments. Example file name: Jane.xml
Hint: If you use the same cloud between devices, set up a common folder with name of your choice. Then you can Import and Export to and from this folder.
Export (Share) Person File
1. Tap Options (3 dots)
2. Select person name from list
3. Share file to app, cloud, email, folder of your choice. Choosing an export destination that you can access on the other device using the Import File function.
